Getting Creative: A Day in the Ceramics Studio
27th January 2020
Christmas time is always a busy, exciting period in the year – especially here at Cotes Mill in our Ceramics Studio! While it was a little quieter in the office, I was lucky enough to go and spend a day in the studio and help out our ceramicist Hannah, who had been working tirelessly to fulfil all of her orders before the end of the year.
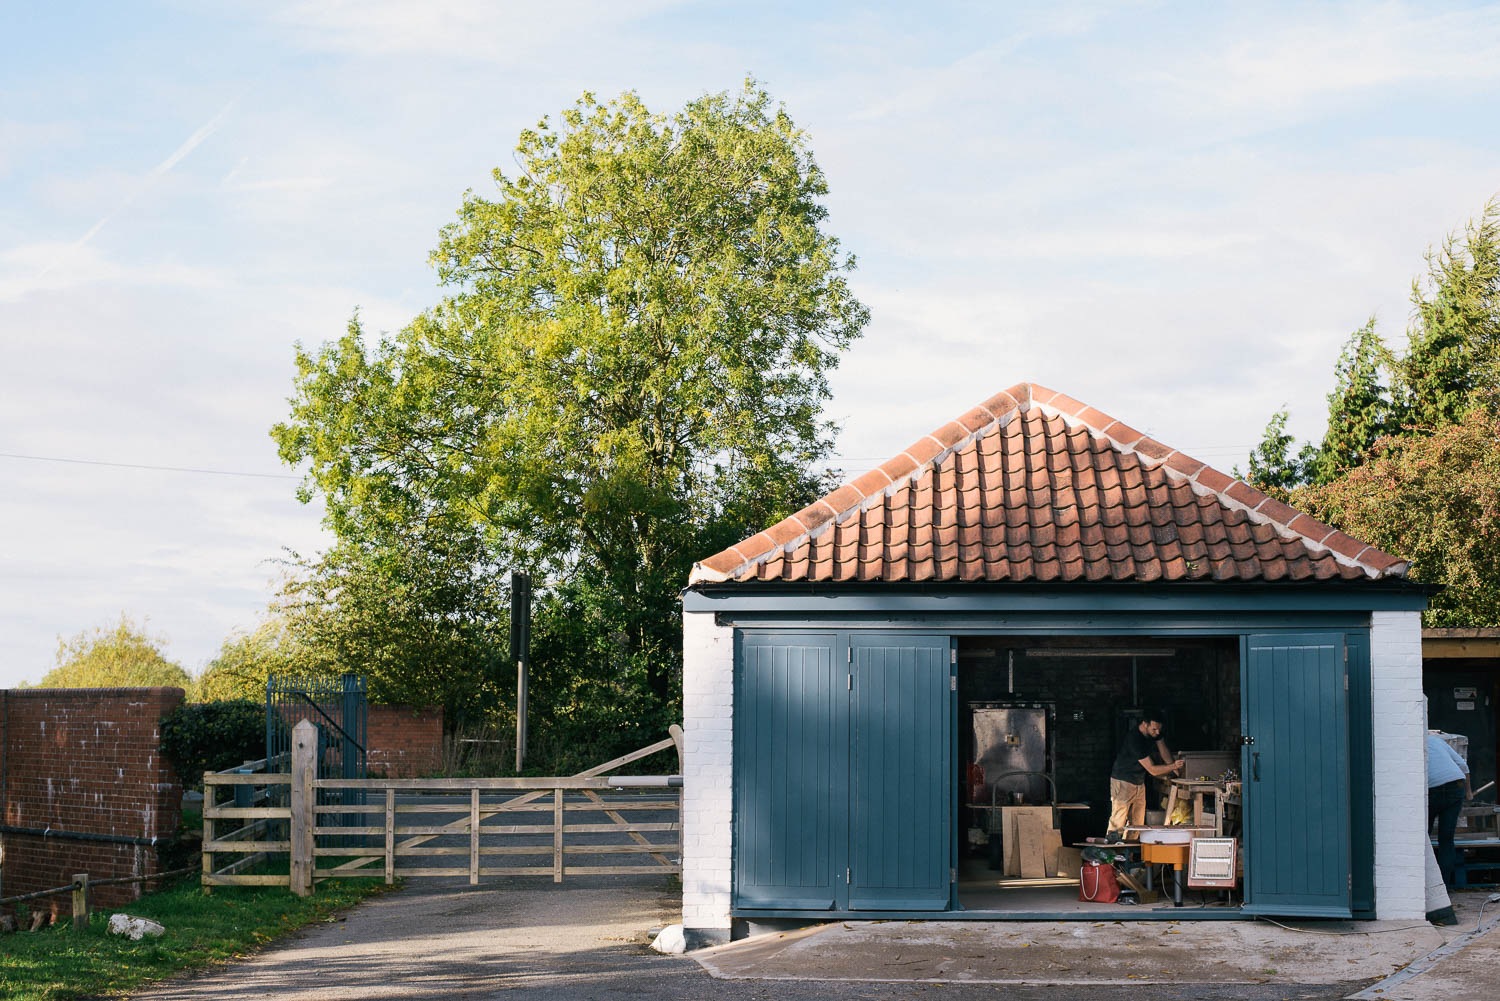
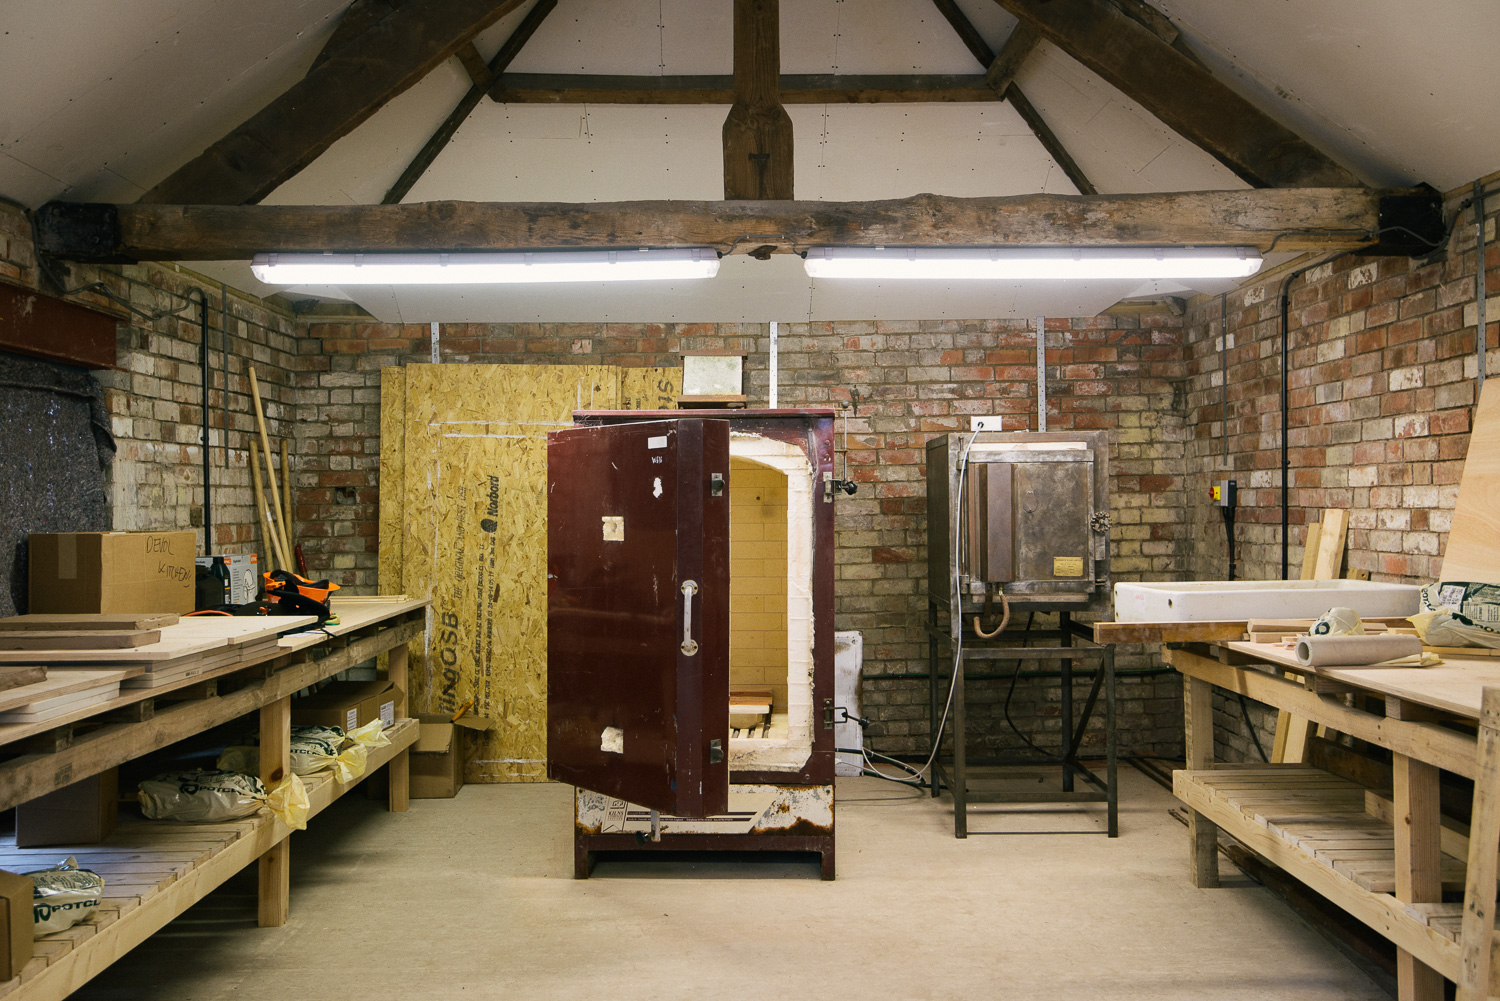
The Ceramics Studio is our little creative hub here at Cotes Mill. It is full of talented makers creating the accessories for our sister company, deVOL, and the birthplace of our handmade tiles. As you can imagine, it was an exciting shake-up in my daily routine and gave me a better insight into the more creative side of our company.

In the Morning
I got to the studio in the morning, with my packed lunch tucked under my arm, whilst wearing a few layers of scruffy clothes, and the arty side of myself ready to play with clay. Hannah greeted me and gave me a tour around the ceramics studio.
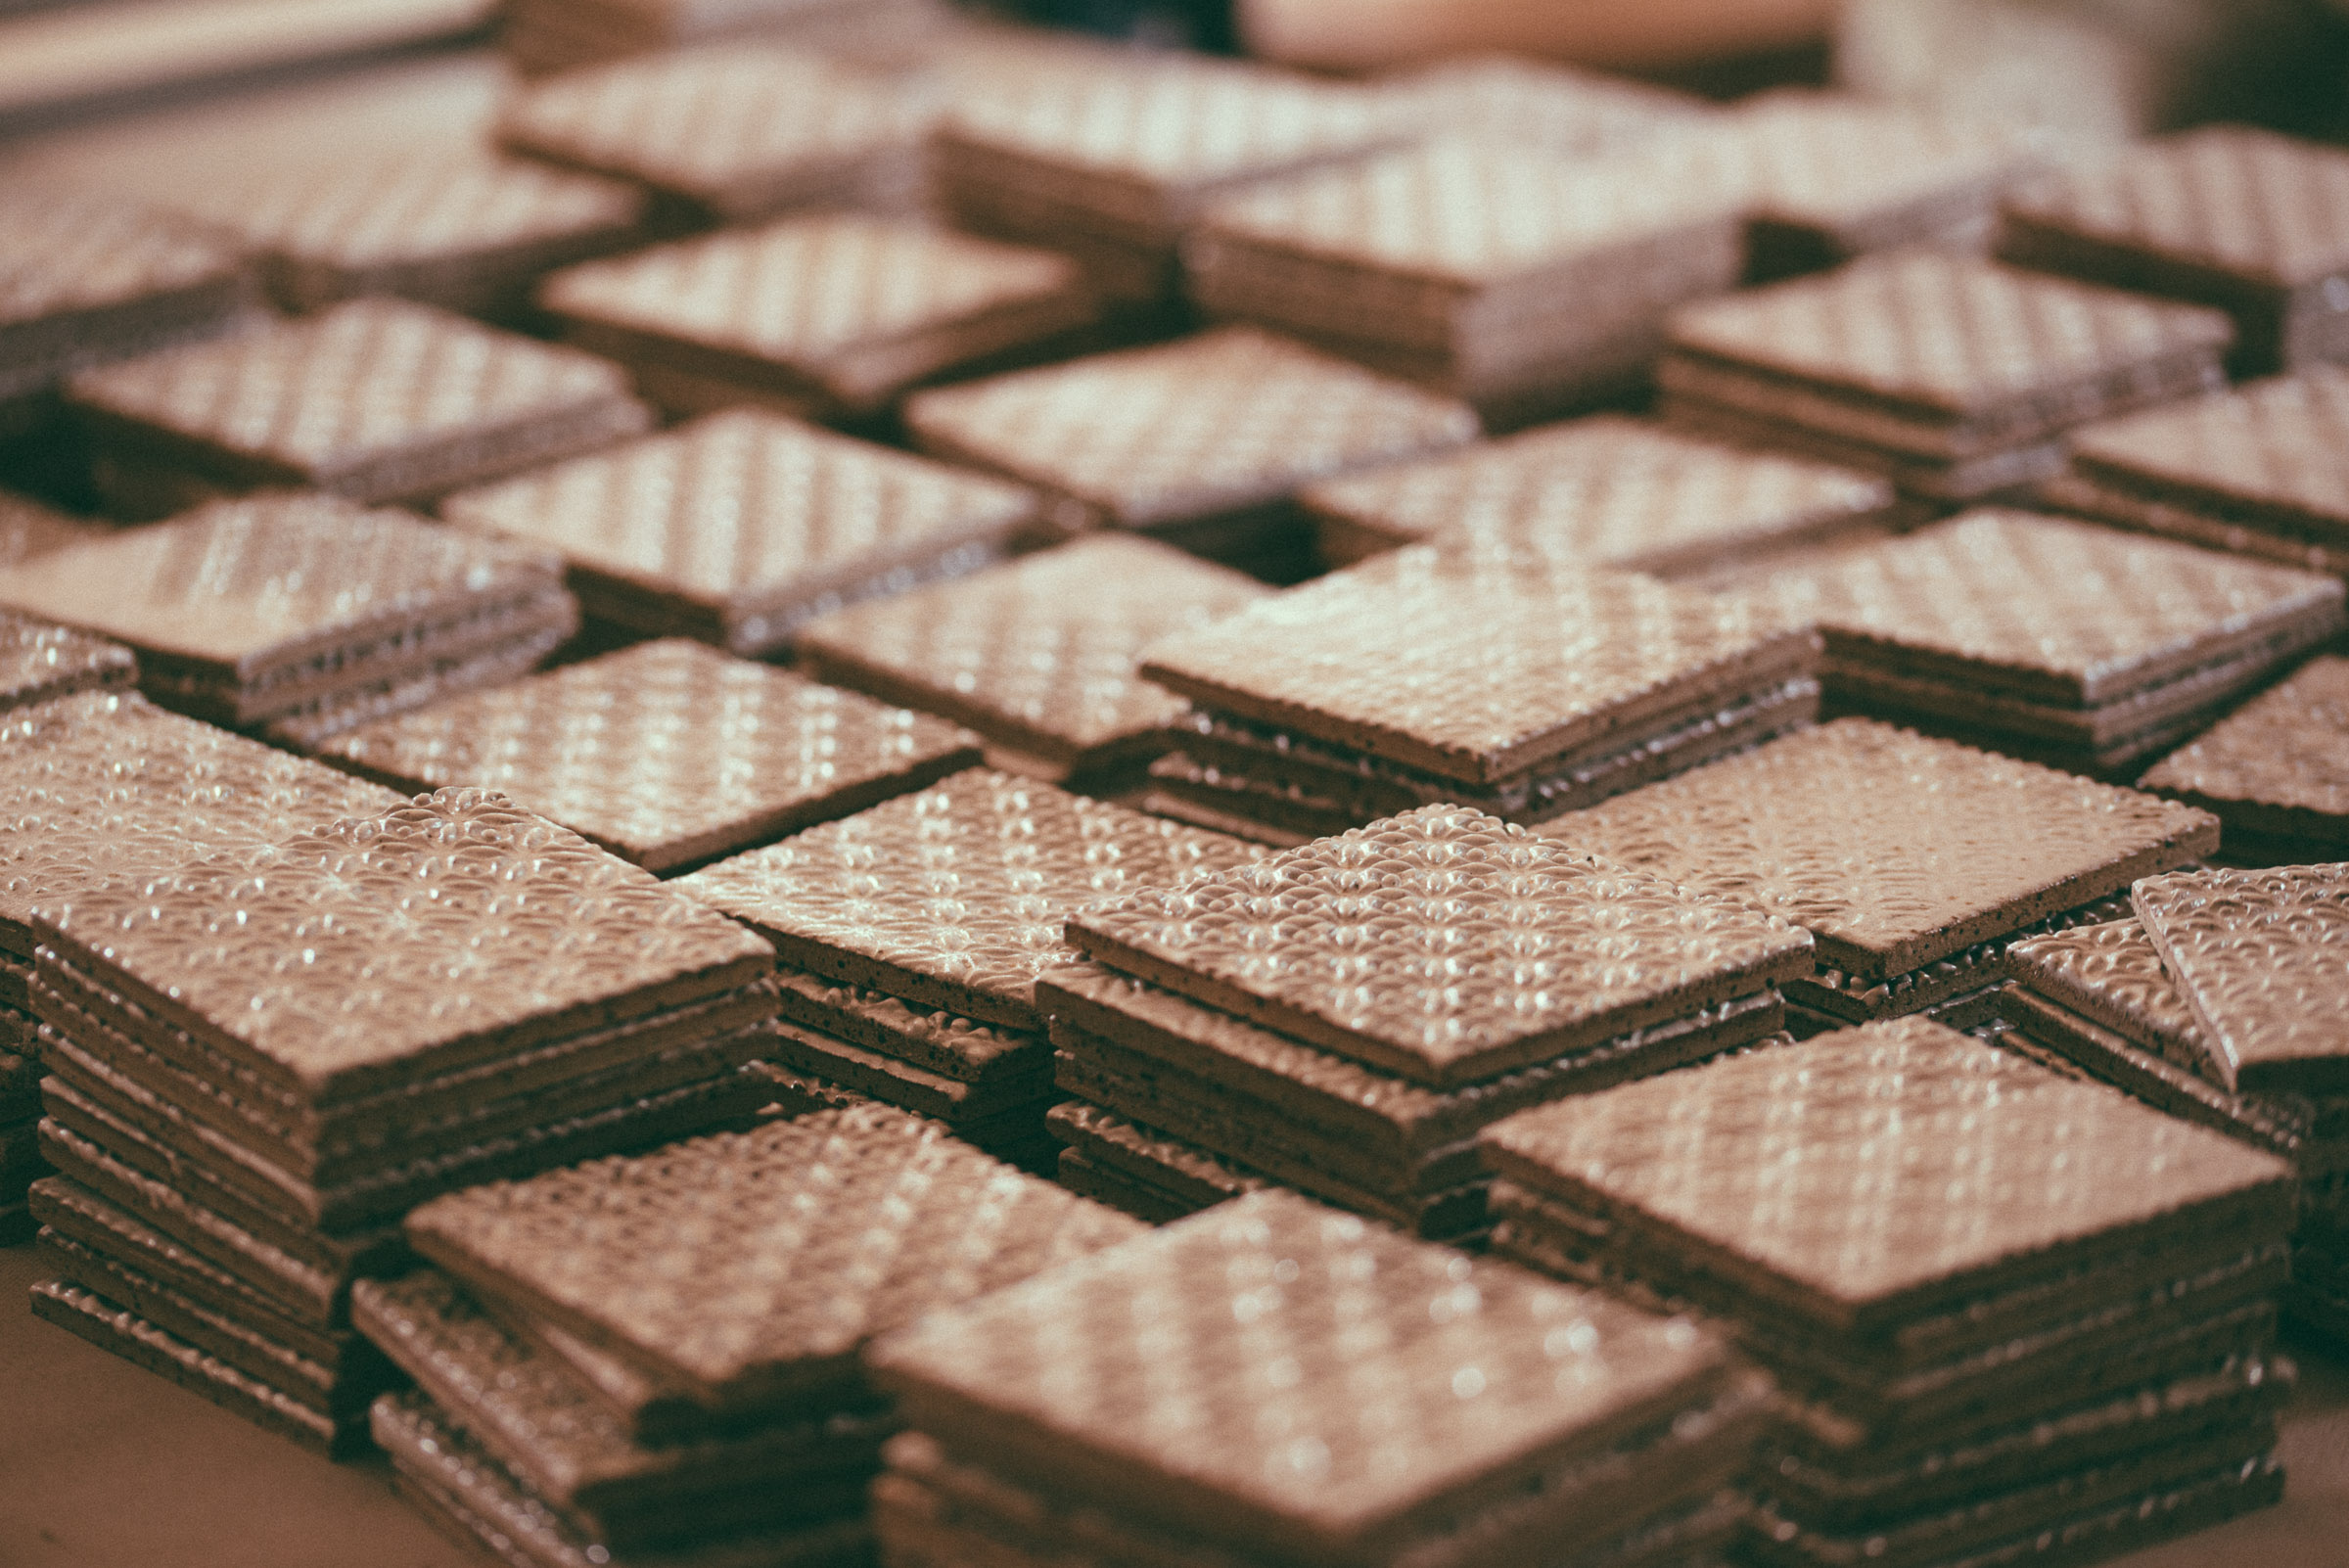
First, she showed me the corner where they keep the minerals and oxides (which look like flour). She explained that these are used for the glaze. The minerals act as a base and the oxides give the tile colour. The minerals and oxides react with the heat once they’re in the kiln. Hannah also showed me her own formula with oxides resulting in her uniquely coloured handmade tiles!
Rolling the Clay
We then moved on to the next stage (what I would be doing that day) – rolling the clay! As you can imagine, rolling clay is nothing like rolling pastry, it takes a lot of prep, a little bit of muscle and use of a slab roller.
After rolling a few slabs with Hannah’s help, I was left to my own devices, repeating my new skill to roll as much clay as possible. The trick was getting it neatly on the slab to reduce the number of offcuts. It was fun to be involved in the initial phases of the process – learning the intricacies of how the raw material goes from a lump of clay to a beautiful tile ready for installation.
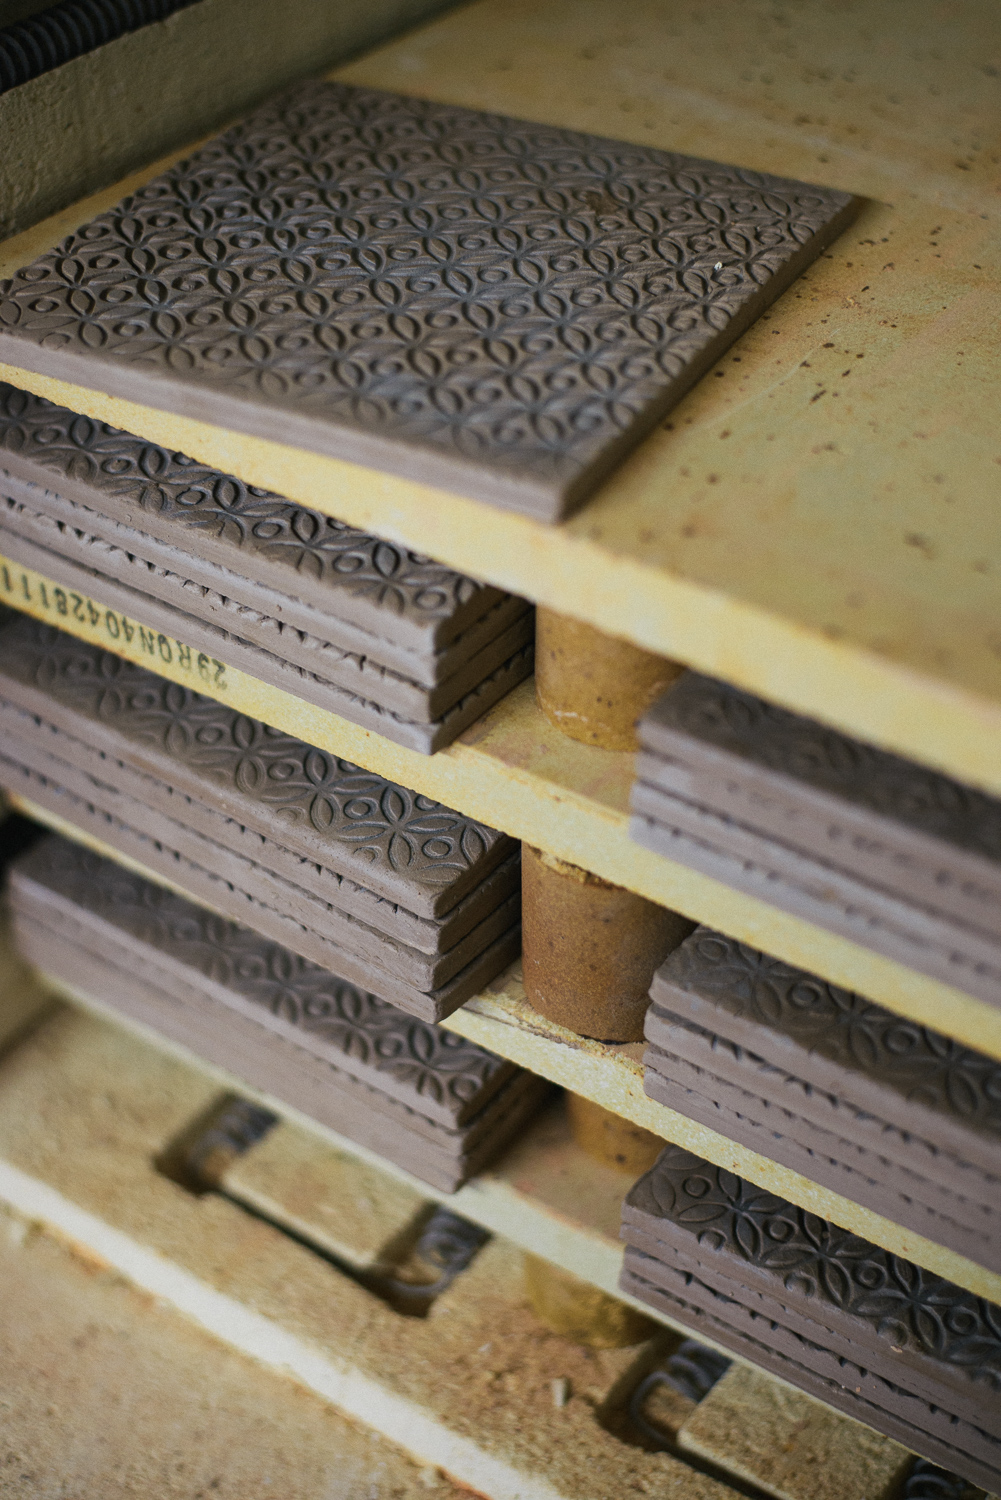
Whilst I rolled, Hannah took a trip to the kiln to fire the slabs she had glazed the day before. Hannah explained that her tiles need to be fired twice, initially to dry the clay, and the final time after the tiles have been glazed. I also learnt that after each firing, the slabs need four days to cool. So, you can imagine how much juggling Hannah needs to do.
Adding the Print
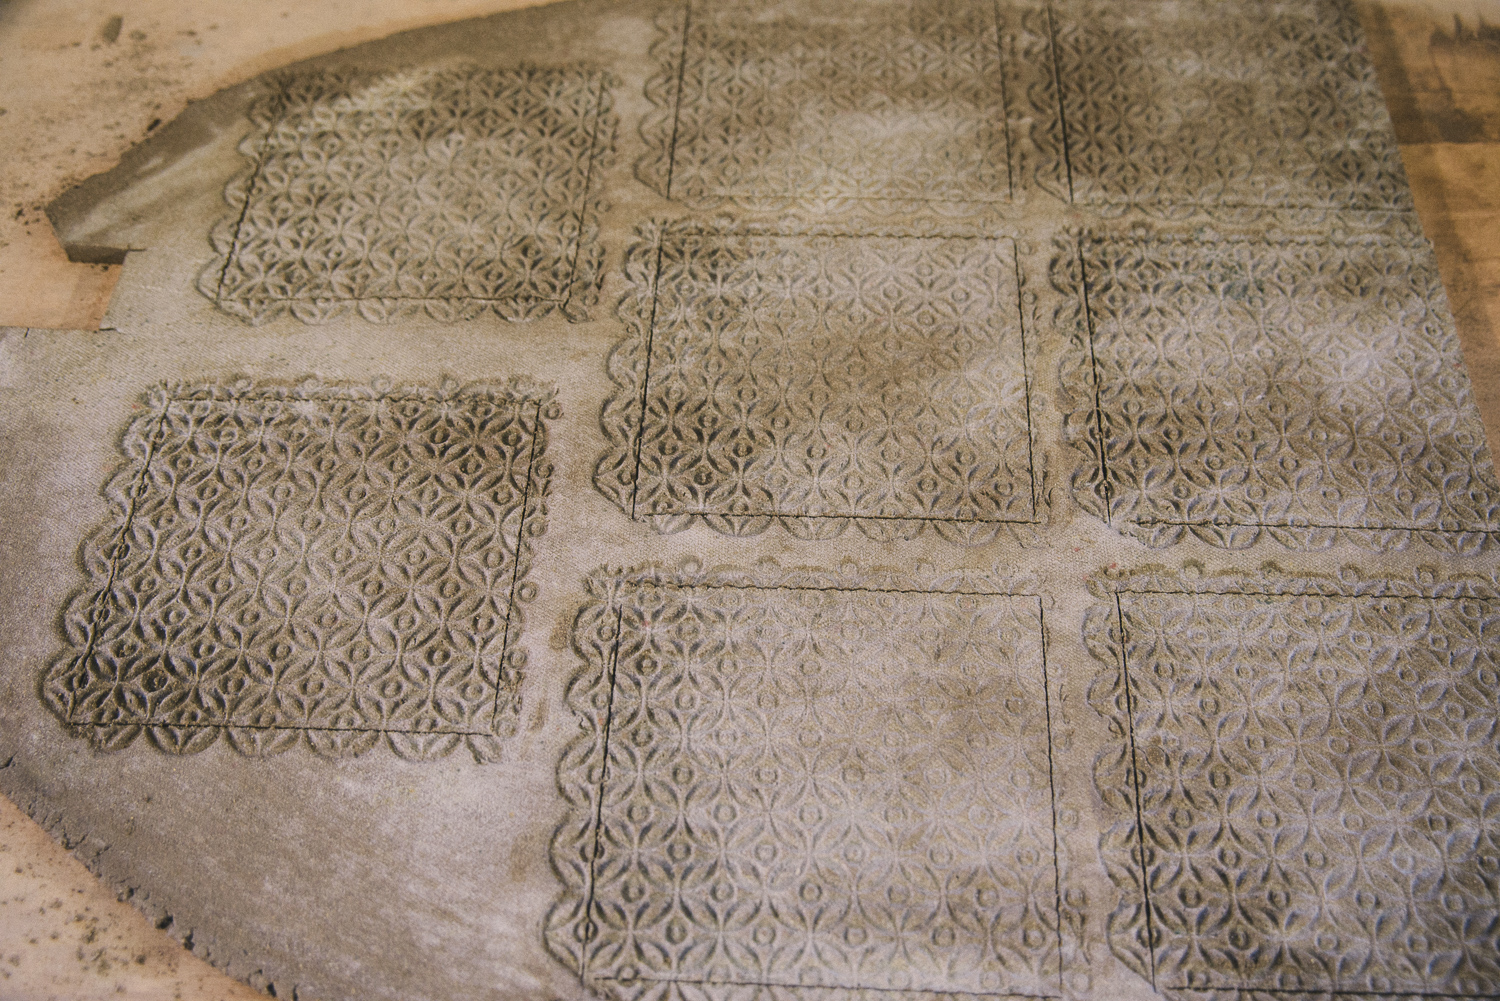
After lunch, Hannah showed me the next phase of the process – adding the print. I started off by sprinkling a parting powder on the rolled slabs and began the printing process. This involved using a 3D block printer with Hannah’s beautiful Whitechapel design. This was a really fun part of the process as it was rewarding to see her design come into fruition. Once these were completed, they were put to the side ready for Hannah to cut into tiles the next day.
Packing an Order
For the final part of the day, I packed an order for one of our lovely customers. Starting with a quality control check to ensure that our customers only receive the best of our handmade tiles. After this, I began to pack the order. Hannah has recently cleverly changed her packaging to corrugated cardboard as an eco-friendlier alternative to the previous foam pouches.
It was rewarding to see the final product in their box ready for shipping.
That was my day in ceramics complete! I left with a new perspective on the effort and care that goes into our handmade tiles. It was interesting to learn more about the creative side of our company. It was also fascinating to learn how a lump of clay evolves into Hannah’s beautiful handmade tiles ready for customers to install in their homes!
If you have been inspired by this article and would like to know more about our Handmade Collection, please contact our sales team on 01509 234000 or email us at enquiries@floorsofstone.com.
Our Handmade Tiles are also live on our website which you can access here: https://www.floorsofstone.com/our-tile-range/handmade-tiles