Renovation, Renovation, Renovation
20th July 2016
Recently I have spent a lot of time looking at refurbished furniture and getting plenty of inspiration. I came across so many lovely ideas and designs and decided that the only way forward was to renovate my own piece of furniture. You will often find me looking for new ideas and new projects to work on, but this has been my biggest yet.
In all the time I have spent looking at ideas, one piece of furniture I have always wanted and have been pretty obsessed with (to say the least) is a Welsh dresser. Most evenings I pop onto Pinterest and gather as many ideas as I possibly can. I had been keeping my eye out for a while now as I had in mind the exact sort of dresser I was looking for and when I found this one, it was exactly what I wanted.
I have to admit it was a bit of a bargain. I mean at £45 how could I possibly say no?! I knew it was going to be a fairly big project, but one that I was very excited to start. Knowing where to start is often the hardest part, and certainly my least favourite! So here goes…
First of all, I realised it was going to be much easier to paint and sand in separate components which is exactly what I did, rather than trying to paint it all whilst together. Looking back, I am so glad I decided to separate the two main parts, otherwise it could have become a bit of a nightmare!
Choosing the paint was a whole new world of decisions. In mind I had an idea of the sort of colour I would go for, however, I did not envisage there being quite so many to choose from, and some being very similar. How was I ever going to make sure I chose the right one? Well eventually, I did. I decided that Annabel Duke’s ‘Antiqued White; was the best colour. If you like the chalk paint look, I would highly recommend taking a look at her range.
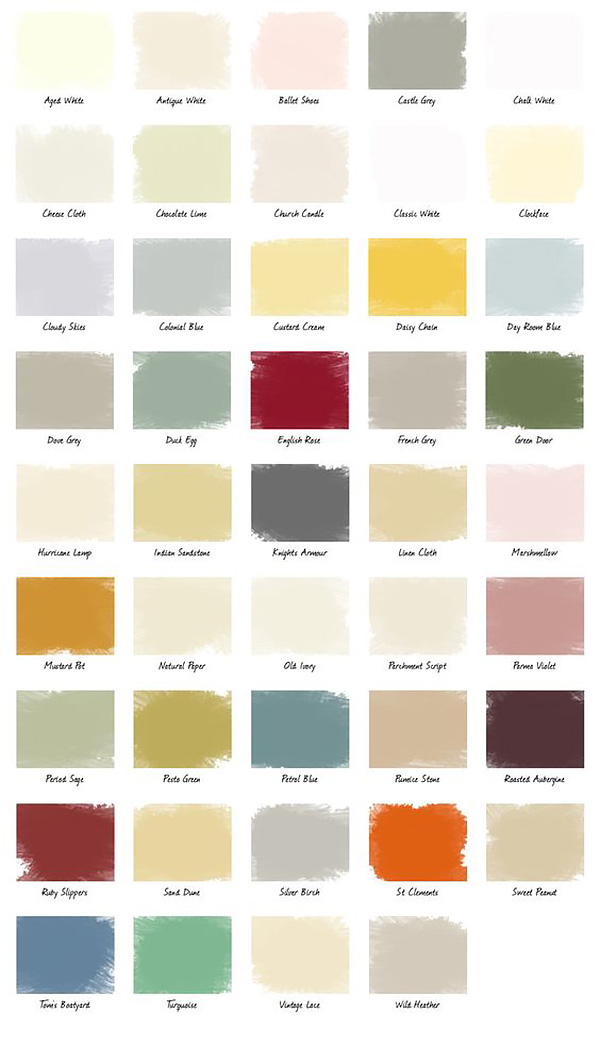
Image found on Pinterest
Once I had chosen the paint, it was time to get cracking! So I set to with getting it painted but boy did I underestimate what a fiddly job it would be! There was a lot of parts to think about and making sure you didn’t miss any little nooks and crannies. After the first coat was applied, I was amazed at how different it was already beginning to look. I was already getting quite excited about seeing the finished project.
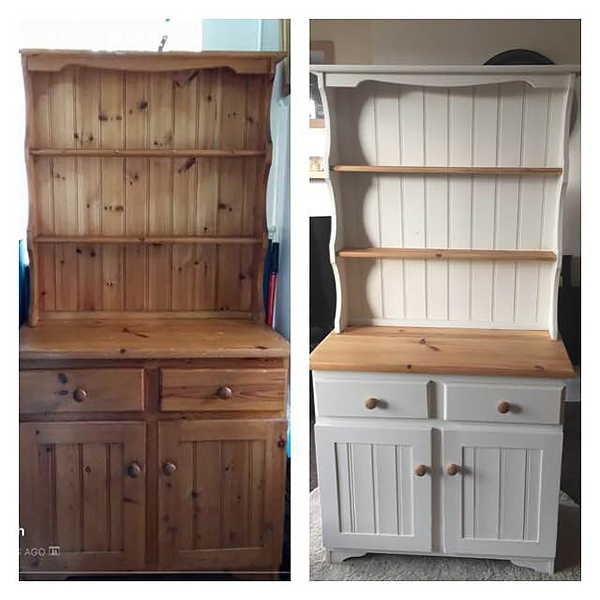
After a hard day’s work over the weekend, the finishing coats and finishing touches were applied. Some parts were sanded down and then stained with a clear wood stain, to give it a little more of a chic style look. When it was all put together, I never thought it would look quite this good. I knew I would be happy with it, but wow! What a difference a bit of paint makes!
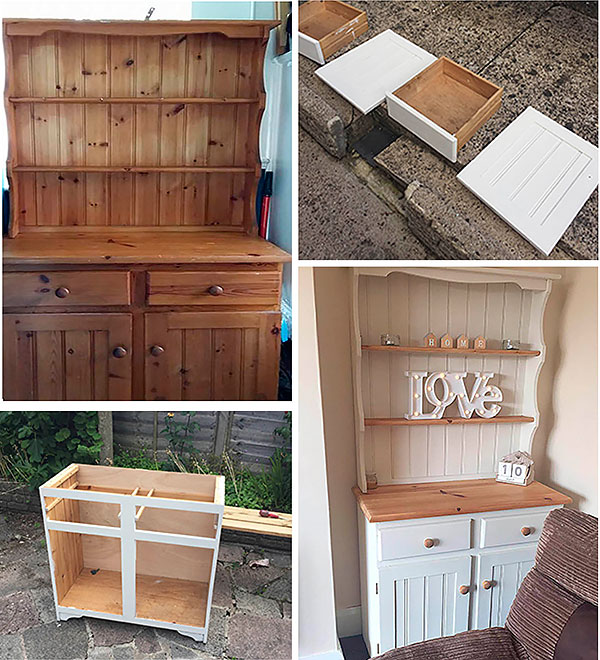
I really could not believe just how transformed it looked after just a few coats of paint. I think my favourite part was adding all of the little accessories and finishing touches. I am still on the hunt for more ‘bits & bobs’ to complete the dresser but for the time being, I could not be happier with how it looks.
I then had the idea to put together the before & after look and this is when I realised how big the difference was. It was a bigger project than I originally thought but it was definitely worth the work put in. If you are into furniture refurbishments, I would highly recommend keeping your eye out for a little bargain and renovating something old into something new.